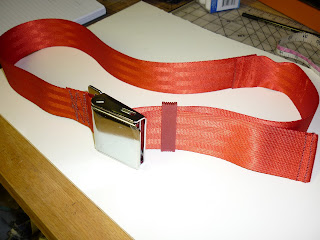
From Seat Belt to Fashion Statement
Here is the basic list of items needed to complete this project:
1 seat belt-the one I used is from my Dad, he ordered them for my Mom's
Toronado, but for some reason they didn't work, so he decided to pass them on to me for the exact reason I'm using them. Thanks Dad!
A sewing machine
thread
tape measure
straight pins
scissors (small and large)
lighter or candle
This first step it a “personal preference” for me. You do not have to do this step.
Some people like these extra labels for their own personal reasons, I do not, so I remove
this tag.
Next you are going to remove the metal pieces what would normally be used to anchor
the belts to your car. These are the pieces with the holes in them. DO NOT remove the
buckle! In fact it's a good idea to keep the belt buckled, as a reminder. Also do not put
your thumb in the way of the cutting blade, like I did (dork). I use a razor knife to cut
these threads since they are a bit thicker than normal threads. Do this step very
CAREFULLY!
Then you are going to unbuckle the belt and measure each side to determine the size of
your belt. Mine is going to be about 38”. Be sure to leave a 3-5” tail for adjustment of
your belt (see top of photo).
The locking part (female) measured 15”, so this side doesn't need anything further done.
The insert part (male) needs to be cut down to 24” (15”+24”=39”). You are going to
allow one extra inch for overlap.
Once you have cut the male part down you are going to need to “finish” the edge to
keep it from fraying. You could probably use fray check but since the belts are nylon I
use a lighter, or candle, to gently melt the edge of the fabric. Just gently run the cut edge
of the belt along the flame until you have a nice even melt.
This next step doesn't make a huge difference by I like to lock the belt together before I pin it so that the finished edge is facing the body, of the person wearing the belt, on the
male side of the belt. Again this is totally a personal preference thing.
Note the right side of the belt above.
Then overlap the two cuts edges by 1” and pin to hold. Keep in mind
that this seam will not meet in the center due to having a “short” side.
thread and double stitch for extra holding power.
And there you have it, a “Seat Belt, Belt”!
Note, that unless you have extra wide loops on your jeans, most seat belts will not fit
through the loops, and these belts are usually worn low on the hips.
I hope you enjoyed this tutorial. It was a fun learning experience for me and I hope to do
more.
I would really appreciate any feedback on it, good or bad, so don't be shy.


No comments:
Post a Comment