Thursday, October 28, 2010

A Couple Of Things....


I've been working on for Halloween fun! You can see I've started working on some very basic designs for Halloween Needle Punch projects. These will most likely end up as projects for next Halloween.
 You can see a bit of the progression. My "rough" drawings, then copies, and coloring in with crayons (of course). I could use markers but I don't want them soaking through the paper. Next I will pick my embroidery floss colors. Do you like my mondo bag of colors to choose from? Bought it at JoAnn's and used a 40% off coupon. Great deal!

I also picked up a mask from Micheal's I think it was a $1.99. Wait till you see what I am doing with it!

This week is conference week for the boys. I got Duncan and Connor's out of the way on Tuesday. They are both doing great! I always enjoy those conferences. Dakota's are in about an hour......let's just say it should be interesting.....

It's been half days all week for school (except the high school). I'm really looking forward to the weekend and the boys (especially Connor) can hardly wait for Sunday night Trick or Treating! The weather around here usually isn't that great for All Hallows Eve. It's either cold, rainy or both. Keep your fingers crossed for a freak warm up :-D A Mom can alway hope anyway.

Have a great day!


Wednesday, October 20, 2010

Look What I Found!


This is a beaded pouch I made, hmmmm........ over 15 years ago. The design came from an issue of Bead & Button for Peyote Stitch. There is a loop on each side so it can be "worn" as a (rather large),  necklace. The pouch measures about 3" square, without the fringe. I think that maybe, I should make a "chain" for it. I'm not sure out of what yet, but maybe Macrame would give it the "Natural" look that I think it needs. Any suggestions?

It's been a busy week. Duncan ended up being home sick, for a day, for the 3rd time in 3 weeks. This prompted an immediate visit to the Dr. After the blood work they decided that it was the same virus, lingering for the past 3 weeks. I admit that it worries me a bit. He tends to be prone to headaches (not migraines) and this time it was accompanied by a fever. Needless to say, he is back at school today and unfortunately missed the a lot of Cross Country, since even when he was at school, he still didn't feel up to running. Hopefully Spring will prove to be better for him Sport wise, running track.

Now I am off to design a quick needle punch design for Halloween!

Thursday, October 14, 2010

"Changing Channels"

I think that would be a good term for going from satellite & dsl to cable. What a freakin pain in the butt!! It's taken about 2 days to get emails and such updated. I'm sure there are a couple of things I've forgotten but I'll remember sooner or later. We also made the decision to drop the land line all together. Strange to give up the phone # I've had for almost 20 years, but the majority of the calls are from survey people and such. Cell phones are pretty much the thing around our house and here to stay!

The reasons for the change, $$$ being the first, second Frontier (formerly Verizon) seemed to forget to send statements and when the bill went up, around the beginning of Summer. No one seemed to be able to give me a straight answer as to why, nor were they capable of sending me an itemized bill, paper, email or otherwise. Makes me wonder if this happened to anyone else when things switched over.

Anyway, I'm over it and moving on to trying out cable. 

I've been working with polymer and on a couple patterns for punch needle embroidery. You should see a "hint" of something next week.

Monday, October 11, 2010

Cake Balls & Marshmallows....


Chocolate & Vanilla


Vanilla & Carrot Cake


Red Velvet & Carrot Cake


Pumpkin Spice Marshmallows, Cut

Sugared Up

Have you heard about cake balls? They are an incredibly simple dessert that seems to be making the rounds on the net. In fact, that's where I gleaned the recipe from. All you need is on package of cake mix and one can of frosting. Make and bake the cake according to the directions on the package and them crumble in a large mixing bowl. Add one can of frosting, mix well then form into balls. I used an ice cream scoop to form mine. They can be shaped by hand. You can also refrigerate the mixture to firm it up a bit. This is a hit with Jimmy and the boys! No extra frosting needed.

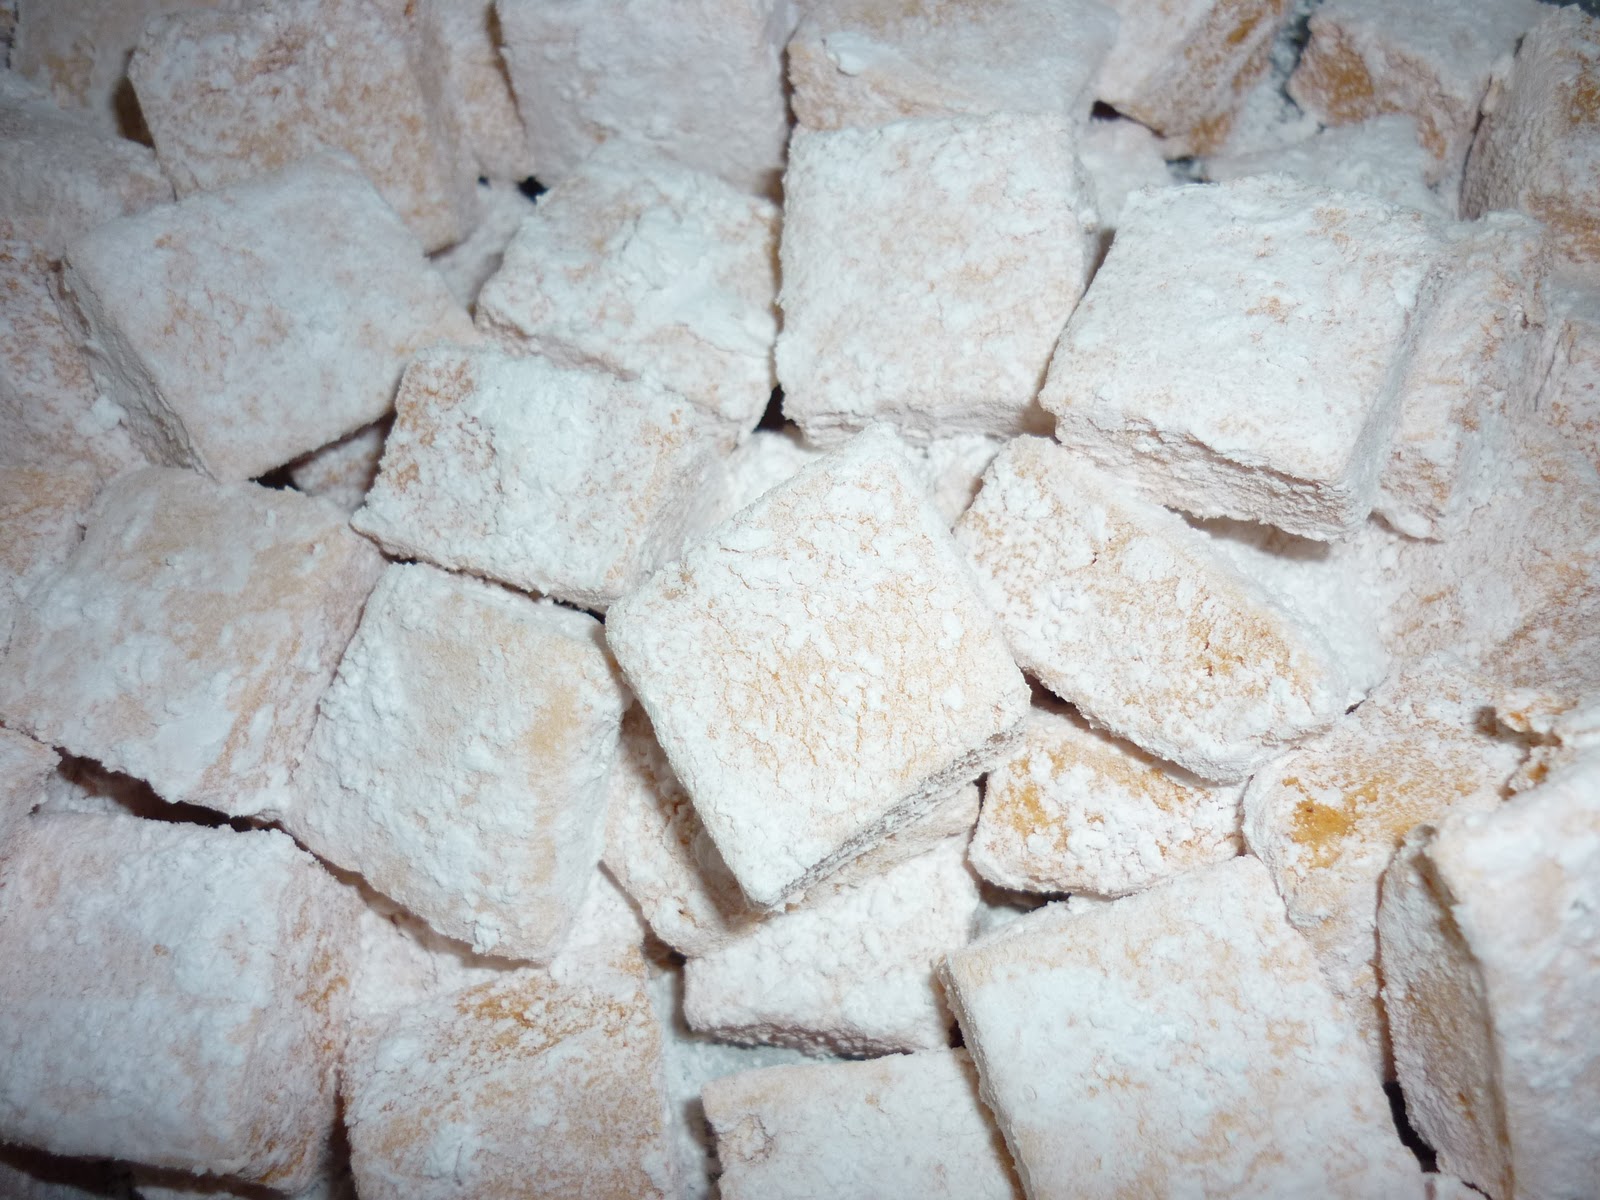
I also whipped up some homemade Pumpkin Spice Marshmallows. Keep in mind that homemade ones are nothing like the store bought variety. They have a certain light and airy quality and melt in your mouth. Here is the recipe, and I highly recommend using a stand mixer, since these require an intensive amount of mixing (over 10 minutes) and that would be very hard on an electric hand mixer.

Pumpkin Spice Marshmallows

3 pkgs unflavored gelatin
1 cup water (split for use)
1-1/2 cups granulated sugar
1 cup light corn syrup
red & yellow food coloring (or orange)
1/2 cup canned pumpkin (not sweetened)
1 tsp cinnamon
1 tsp ginger
1/4 tsp nutmeg
1/4 tsp allspice

Coating for marshmallows
1/4 cup powdered sugar
1/4 cup corn starch
(I ended up using quite a bit more than this)

Prepare a 9x13" pan by lining with aluminum foil and spraying with non-stick cooking spray. Sift together powered sugar and cornstarch and apply a generous dusting to the entire pan. Set pan and sugar, cornstarch mix aside for later.

Place 1/2 cup water in bowl of your stand mixer (fitted with the whisk attachment), and sprinkle gelatin on top. Let gelatin sit and dissolve for at least 5 minutes.

Place remaining 1/2 cup water, corn syrup, and granulated sugar in a medium saucepan over medium-high heat. Stir until sugar is dissolved and insert candy thermometer.

Allow mixture to cook without stirring until it reaches 240 degrees (soft ball stage).

Once sugar mixture has reached the proper temperature, remove it from the heat immediately. Proceed to turn mixer on low, and slowly pour the hot syrup into the mixer bowl.

Gradually increase the speed of the mixer until it is running on high. Whip the marshmallow mixture for 10 minutes or until the mixture is stiff and shiny.

While the marshmallow is mixing, place the pumpkin puree in a small bowl and add the spices. Once the marshmallow has reached the correct consistency, add the food coloring until you have reached the desired shade of orange. Mix until uniform in color. Using a spatula, gently fold the pumpkin puree, spice mixture into the marshmallow, stirring until candy is well mixed.

Pour marshmallow mixture into prepared pan and smooth the top. Allow to sit and firm for at least 8 hours. Do not refrigerate. 

Cover where you are going to cut marshmallows with wax paper and liberally sprinkle with sugar, cornstarch mixture. Sprinkle top of marshmallow with same mixture and turn onto prepared surface.

Carefully peel back foil from marshmallow and dust with more sugar, cornstarch mixture. Then cut carefully into squares with a large knife or use cookie cutters.

Store marshmallows in a dry airtight container at room temperature.

So there it is! My next attempt at marshmallows will be chocolate ones.

Hope you all had a great weekend!

~Happy Monday~

Saturday, October 09, 2010

A New Beginning....


Now that my first tutorial is done, I feel like I'm taking a new path in life. Over the past few weeks I have given up (quit) some things that were incredible time "eaters" for me. First and foremost were the games on Facebook. Ridiculous, when I think about all the time wasted keeping up a restaurant, farm, homestead, kingdom, whatever! There is absolutely no benefit from doing any of those for me, other than avoiding the things I want, or need, to be doing. 

Next is just DOING the things that I want or need to do! The first was getting that tutorial done. As simple as it may seem it was a huge thing for me. It's not "perfect" by any means, but the gist of the idea, I think (hope), was clear. I have also been clearing out my creative areas. Whether it's selling things on Ebay or donating to the library, Services for the Blind, or Goodwill.

I am pretty much busy every day of the week and it's a good busy, whether I'm creating, cleaning or running the kids to sports and back. Life feels good!

Granted, I still read the blogs I keep up with and still check in with facebook, using it more as a promotional tool than anything else.

So my hopes for my blog are to start posting as often as I can and keep you up to date on what I'm working on. I hope to post more free tutorials but from now on I won't make promises of when I'll have them ready, since I haven't been very good about following through on dates. So the picture above is of a few things I made last year out of polymer clay. I want to incorporate them into a couple of jewelry designs over the next week. Should be fun!

So here's to new beginnings! I hope you're having a terrific weekend!

Friday, October 08, 2010

I Finally Have It Done!!!

Whoo Hoo! Without further ado.....and the twenty million reasons why I didn't get it up when I said I would....


From Seat Belt to Fashion Statement


Here is the basic list of items needed to complete this project:
1 seat belt-the one I used is from my Dad, he ordered them for my Mom's
Toronado, but for some reason they didn't work, so he decided to pass them on to me for the exact reason I'm using them. Thanks Dad!
A sewing machine
thread
tape measure
straight pins
scissors (small and large)
lighter or candle


This first step it a “personal preference” for me. You do not have to do this step.
Some people like these extra labels for their own personal reasons, I do not, so I remove
this tag.


Next you are going to remove the metal pieces what would normally be used to anchor
the belts to your car. These are the pieces with the holes in them. DO NOT remove the
buckle! In fact it's a good idea to keep the belt buckled, as a reminder. Also do not put
your thumb in the way of the cutting blade, like I did (dork). I use a razor knife to cut
these threads since they are a bit thicker than normal threads. Do this step very
CAREFULLY!


Then you are going to unbuckle the belt and measure each side to determine the size of
your belt. Mine is going to be about 38”. Be sure to leave a 3-5” tail for adjustment of
your belt (see top of photo).


The locking part (female) measured 15”, so this side doesn't need anything further done.

The insert part (male) needs to be cut down to 24” (15”+24”=39”). You are going to
allow one extra inch for overlap.


Once you have cut the male part down you are going to need to “finish” the edge to
keep it from fraying. You could probably use fray check but since the belts are nylon I
use a lighter, or candle, to gently melt the edge of the fabric. Just gently run the cut edge
of the belt along the flame until you have a nice even melt.


This next step doesn't make a huge difference by I like to lock the belt together before I pin it so that the finished edge is facing the body, of the person wearing the belt, on the
male side of the belt. Again this is totally a personal preference thing.

Note the right side of the belt above.


Then overlap the two cuts edges by 1” and pin to hold. Keep in mind
that this seam will not meet in the center due to having a “short” side.


Then sew two rows of zig-zag stitch across the overlap about 1/2” apart. I use regular
thread and double stitch for extra holding power.


And there you have it, a “Seat Belt, Belt”!

Note, that unless you have extra wide loops on your jeans, most seat belts will not fit
through the loops, and these belts are usually worn low on the hips.

I hope you enjoyed this tutorial. It was a fun learning experience for me and I hope to do
more.

I would really appreciate any feedback on it, good or bad, so don't be shy.