Thursday, March 22, 2012

On To Embroidery

Again, time has gotten the best of me.

The weeks are flying by, but I've managed to complete at least one project and hope that more will be following.

For a brief time I was on the knitting path and completed a couple of projects......but then, as usually happens, my brain went into "numb" mode and the one pair of socks I started...well.....they didn't quite make it to completion, although I started to turn the heel, and...well....at least, I have a stitch counter marking the row where I left off so I can continue on my way, when I hit "knitting" mode again (I hope).

The embroidery began to form in the back of my mind, when I realized how many embroidery items I had done from, oh...say about 20 years ago, or so. My Mom has some, my Aunt has some and I have have a few things, hanging around. While my Mom was packing up (they retired South), she ran across a few things that I don't even remember making.

This lead me to a very vintage kit, that I found at the thrift store, and instead of auctioning it, well, I decided to make it, instead. The fact that the base fabric was burlap fascinated me, and the kit was referred to as "fringe craft" just added to the allure. The kit was produced when I was just a wee one, so it's amazing that it survived un-opened after all of these years.

    
This shows what the completed item is supposed to look like....


Everything that was included in the kit, and burlap on stretcher bars ready for working.


The progression of the project which involved mostly chain stitch, some lazy daisy and a touch of straight stitch. For the fringe on the birds you wrap yarn around a specific size cardboard strip, and cut so that they are all the same length. Then you use a steel crochet hook to add them to the design. It was a lot of fun, but "fringing" took a bit of time, and got a little monotonous after awhile, however I forced myself to finish and was very pleased with the results.


Now I just need to turn it into a pillow!

What do you think?

Oh, and I've already started my next embroidery projects! Yeah!

Monday, December 05, 2011

Been Gone Too Long.....

You know what I did? I went and got a job, it wasn't on purpose, but for now we could really use the income and the hours suit me. However, Mondays are not what they used to be, back when I looked forward to everyone leaving the house. Anyway, it is what it is and I refer to it as being somewhat of a "cush" job. Remember back when I was helping out delivering auto parts? Well they offered me a position. I told them that I couldn't be there early because I have kids to drive (zero hour class) and a young one who still needs someone to get them off to school, thinking this would pretty much disqualify me for working. Well, low and behold, they came up with a route for me that starts late enough and ends fairly close to home. The pay isn't too bad, and with Christmas just around the corner, it has been a blessing.

For some odd reason this has led me to knitting. Don't ask me why, but one of my girlfriends thought that maybe it was because I now needed something to stimulate me mentally, and it's portable. Now you know I crochet too, but for some reason knitting is taking the forefront, at the moment. Last night I finished a Slouchy Hat for my 16yo and will next be working on fingerless gloves and a particular round washcloth that I thought was cool looking. Oh and on the crochet front, it hasn't gone completely by the wayside as my 8yo is now learning how to do it. We started him chaining last night, and he is extremely pleased with himself, which pleases me!

Now it's time to head to work! Have a Happy Monday!

Wednesday, September 14, 2011

WIP's and Future Ideas.....

I didn't expect to be posting this late in the week, but at least I'm finally doing it.

Last weekend was filled with fishing, crochet and a bit of tatting. The fishing part wasn't too bad, my 13 yo brought home a nice looking Humpy, which made a wonderful dinner!

Next, I've been working on a vintage doily pattern from Elizabeth Hiddleson. This was a find at a garage sale. I bought a box of crochet/tatting magazine that had a few loose patterns that someone had pulled from some older magazines. Want to guess what I paid for this box of treasures?...........25 cents. Can you believe it! Anyway the pattern is called "Yellow Rose Doily". However, I did the roses in red. I'm thinking that the finished doily might make a great starting point for the back of a vest....hmmm.


Next, I've also been re-learning to tat. Now this has shown me that I have a long ways to go with becoming proficient at this. I quickly made up a mini bookmark (see above) for practice, and then started on a bigger collar/necklace project (see below) and screwed up right away. It's hard to see, but I actually have too many picots on all but the first ring. Oh well, I will continue with it since I need the practice, and until the thread runs out. I definitely need to pay closer attention to the directions. Have I mentioned that I'm a needle tatter, but am going to learn to do it with shuttles also.  For me, I think it will give me a better understanding of how the threads work, overall, which would be a good thing for me in, maybe, designing my own lace.


So this is how things are going for this week.

Have a Happy Hump Day!

Friday, September 09, 2011

Tatting

Here are the two projects I was working and I have to tell you that the scarf (above), as easy as it is, well I ended up screwing it up when I got a bit of a tangle in the yarn. Of course, I forgot where I was, and ended up pulling the yarn through for a chain instead of making a ring like I was supposed to....oye! So that, I decided, was the end of that, for now anyway. I was just starting to work my way back down the other side, literally the first turn. Give it a week or so, and I will most likely go back and pull out my mistake, but redoing mistakes on tatting is not as easy as crochet, by pulling it out and starting again. Tatting, at least for me, requires cutting, and gently pulling out and then adding yarn back in.

The second project (yellow flower) was an experiment from Priscilla Tatting, Book 3. There is an edging in Flower Design, using Twisted Tatting, also known as Josephine Tatting. It's a fun design, but I only did one motif just to see what it was like. I really enjoyed "twisting" things for a different change of pace, but I need to note that I didn't use no. 30 crochet cotton, as called for in the directions, but instead used size 10 cotton for a much larger motif. With a little adjusting, I think it would be wonderful to put on a pair of jeans or maybe a hat.

Now that the kids are back in school I'm working on clearing two work areas. One for leather, and the other for clay. That is one of the wonderful things about Tatting and Crochet, you do NOT need any special areas to work in. However, I like to keep things interesting, and add a lot of variety to my work. I do "dominate" a bit of the house, but at least I keep it out of the kids rooms, the laundry room, and the kitchen (for now)  : )

Now to get back to work and maybe squeeze in an episode or two of True Blood before they get home from school.

Have a wonderful Friday!

Monday, September 05, 2011

School Prep & Fishing

So the last couple of weeks got extra busy, and I don't mean craft wise. Between school shopping and fishing there was barely time to breath, but it was a good kind of deprivation : )  We also added one last impromptu camping trip. I'm looking forward to the kids getting back to school so I can breath a bit, lol!

The camping trip was a lot of fun, and if you pay attention to my blog I'm pretty sure you know that I am NOT a fan of camping, however if the right people are there, and I'm not sleeping in a tent, I don't mind so much. My hubby's cousin recommended the spot (and we met them there), it was a great area, not too far from home.

 The boys sleeping arrangements.

 Don't they look like they're having fun? This was down time after setting up : )

Next we spent a ton of time out fishing with my 13 yo. This was one of his catches! A nice 10 lb Salmon. We actually ended up limiting out on that day. Didn't have another day like that though, darn it!
 
And last, but not least, we spent the day at a BBQ with friends where I was wearing some of my hand made rings. They were a hit, which was really nice. The bottom one with the pink stones in not my design, the tutorial can be found here Opposites Attract Ring. Makes me want to start making rings again....but in the meantime....

On the creative side, I have been tatting. I didn't think about snapping pictures of it though, but if you want an idea of what I've been working on, and it's really just a way for me to practice, go to this site Totus Mel. I've been practicing two of her designs the chain maille and a scarf. If you are just learning to needle tat, this is an excellent site to visit. If you're looking to buy some fantastic needle tatted items this is her Etsy shop.

This should be enough to keep you busy until my next post!

Hope you're enjoying your long weekend!

Friday, August 26, 2011

Sorry, A Little Interruption.........

I did a little fill in for a week delivering Auto Parts for a friend, and preparations are beginning for the boys to get back to school. I have a couple of projects going, but the friendship bracelets have gone by the wayside, for the moment. The weather is finally nice too, which doesn't make anyone want to stay inside. We've had a pretty, um, un-sunny Summer, literally not more than a day or two of sun, then the rain returns, for long stretches. Right now we are on a streak of nice weather, and we haven't had any (streaks) since the start of Spring, much less, Summer. At this point we'll take what we can get.

While doing the driving I did a bit of thinking about my next project. Shrink plastic is fun and great for the kids too. I remember doing this with liver lids when I was a kid. The possibilities are endless! Here is a kit that I own that's well worth the investment. It has jewelry projects for all age ranges, click on this link and this one too, for the smaller guys . I have a couple of things in the works, but haven't had a chance to get pictures. This weekend will be a bit busy, so expect more from me next week!

Happy Friday!

Friday, August 05, 2011

Macrame & Micro Macrame

This post comes back around from Friendship Bracelets. The first bracelets were "technically" macrame. Not surprising since they came about in the 70's (right at the end of the Hippie era), and I can remember my Mom making macrame belts and plant hangers back then. Macrame seems to have a bit of a resurgence these days. I think this is due to more people crafting than ever before, in part, due to the economy (though I hear it's making a comeback), and to the talented Micro-Macrame Artists out there. In the last year I have purchase two Micro-Macrame books that were well work the investment. The first was Joan Babcock's Micro-Macrame Jewelry. This book is well worth the price and offers plenty of tips, techniques and projects to get you started in this creative art.
The second book is also by Joan and incorporates Wire into the Micro-Macrame. Being a wire Artist this book holds a special place in my heart and is full of inspiration, along with techniques and projects. 

However if you have not done Micro-Macrame before, I highly recommend the first book, to get you started before moving on to the more advanced Wired one. You can also go to her website @ Micro-MacrameJewelry.com and order books, kits, and all the other supplies you need to get started.

I need to mention that there are other Micro-Macame books out there, but these two are my hands down favorites!

Keep in mind that actual friendship bracelets are done with craft thread while micro-macrame is made with a heavier nylon cord for more body, but if you would rather try your hand at Friendship Bracelets (with macrame techniques) there are some excellent kits out there. I highly recommend anything made by Klutz. We have purchased numerous books by them, on all sorts of different crafting endevours and never been disappointed with any of their books/kits. Here are 3 different kits by them:


And please keep in mind that while I know these are geared toward girls, boys will enjoy them just as much!

My son's girlfriend makes excellent bracelets. I will get some pictures of the ones she's made for my son, and his brothers, and post them as soon as I get the chance.

This should be enough to get you started, or at least pique your interest. Right? : D

Monday, August 01, 2011

Friendship Bracelets

According to Wikipedia, Friendship Bracelets became popular in the US during the 1970's and was most commonly worn by teens.

Here is an interesting tid-bit I copied from them:

The knotcraft and hand weaving used to create traditional patterns stems from Native American handcrafts, particularly from Central American tradition. According to indigenous tradition, the recipient of a friendship bracelet must wear it until the cords wear out and fall off naturally. The idea is that the friend paid for it with the hard work and love that made it, and the recipient repays the friend by honoring the work. Removing the bracelet before it naturally falls off is a sign that the friendship has gone sour. Another variation of this tradition is that the recipient of a bracelet is entitled to a wish. After the bracelet wears out and falls off naturally, the wish will come true.


On that note I have to say that all 3 of my boys took to making these bracelets easily after coming across this kit by Janlynn.


I actually bought this kit at JoAnn Fabrics & Crafts and ended up using one of their 40% off coupons. 


This kit includes 8 cardboard wheels, 105-10 yard skeins of craft thread, and easy to follow instructions. There are 4 designs that you are able to make and each wheel has 2 designs, one on each side.


To make each bracelet you cut 16 lengths of thread, and then they tell you what colors go where to produce the design that you want. In two simple moves and the rotation of the wheel you will have a bracelet in no time. My only complaint is that the wheel starts to separate along the edges before you finish your 1st bracelet. On that note, all 3 boys had no problems learning how to use the wheel, and have each made themselves at least 2 bracelets (I'm thinking you could easily cut more cardboard wheels, if needed). The 16 years old really likes it, since his girlfriend has made him several bracelets, and now he can reciprocate (She makes them the old fashioned way). Love this craft, but I am looking to check out a couple of books at the library to see about expanding my knowledge and learning a few more "moves", for the wheel which is also known as a "weaving wheel" and falls under my weaving interest. Another name would be Kumihimo, or Japanese Braiding if you're curious, however you can find books on friendship bracelets, Search Amazon.com for friendship bracelets, or Kumihimo Search Amazon.com for kumihimo whichever interests you more.

Sunday, July 31, 2011

It's time!

Yes, it's time to get this show back on the road!

I'll start by telling you that I tried starting a couple of "new" crafts. Emphasis on "try". Why I do this, I don't know. It's like the minute I need to get going on something I already know how to do (ie...sewing, crochet, sculpture, & a touch of weaving...) my mind starts to wander in another direction to try something new. I'm not sure why I do it, but I am, from now on, going to try and work on improving my "known" skills, instead of wandering from all over the place. Now with that said.....I will give a brief review on one of the things I tried.


Hook, Loop n Lock

While not for me, I highly recommend this craft, especially if you like Latch Hook (this is much quicker). This book gives excellent instruction, and lots of ideas. I should also mention that Theresa  Pulido is releasing a new book on this craft around the end of this Summer. Locking Loops: Unique Locker Hooking Handcrafts.
 This book looks excellent too, and offers lots of new ideas for this craft including a Bolero Sweater, Velvet Rose Necklace, Country French Hamper and tons more!

So now I am back to what I already know. Next project on the boards is recycling leather coats/jackets and sweaters into handbags/purses. Along with learning how to do Overlay crochet, and few other stitches I don't know yet.

So this is my new goal, I have 3 (ok 4) main things that I know, and always come back to. Sewing, crochet and sculpture and a little weaving, these are actually pretty large things in and of themselves, with so many variations. Now the test is for me to stick with these "projects". Don't get me wrong, I believe in learning new things, however I tend to get spread out all over the place and need to "stick closer to home", if you know what I mean. One other thing in the sculpture realm is wire so if you see wire remember that is part of my sculpture "thing", although I do polymer clay, mostly.

Oh, and lastly, I try to get my boys interested in creating from time to time. If I'm successful in getting all three of them to start/do a craft, I'll let you know. They are quite the age range (16, 13 & 8) and their interests are very different so when I am able to get them all interested in one thing, I am amazed!

So what will I be posting about tomorrow? Stay tuned.....

Sunday, February 06, 2011

Finding Focus

First off, I must apologize for not being more consistent in posting. This has proved to be extremely frustrating and seems to be getting worse instead of better. Being peri-menopausal seems to be aggravating it. While not having been diagnosed, I'm sure from everything that I've seen and read that I have ADD, including it being a part of my genetic code. Now I must also point out that most, but not all, of my father's side of the family is on some sort of anti-depressant. Am I depressed? I don't think so.

I have come to the conclusion that I do NOT want to take any prescribed medication and am now actively looking for a natural alternative. One of the treatments I have run across is Clematis Flower Essence for ADD. I just started using it 2 days ago. The recommended dosage is 2 drops, 4 times a day. I have been adding it to a little shot glass of water. Can I tell a difference after 2 days.....not sure....I'll have to let you know. If you would like to find out more information on the use of Flower Essence please visit this site....Anada Apothecary. Here is the link to Choosing Flower Essences. I will keep you updated, and you'll know it's helping if I start posting more : )

In the meantime my Mom is doing much better. Next week I'll be taking her to renew her drivers license, which they wouldn't let her do while she was using a cane. Honestly, I think the guy had a bit of a God complex and just liked telling her she couldn't renew. He was an Ass to be sure!

Now that I'm back "working" at home I should  be able to get more done. My "focus" right now is on tatting, and leather work. We'll see how that goes......and if I start posting regularly, you will see more pictures. Right now I'm looking toward the positive.

Tuesday, January 18, 2011

Waiting for the color to develop.....

and thought that since I've failed again at blogging regularly I would catch you up on events of late. We made it through Christmas and New Year's without any major mishaps.  Actually everyone was very happy and that always makes me happy, since I tend to stress at the last minute about what was bought and what everyone is getting. There were no complaints! Yeah!

Oh and the color that's developing, is on my head, black to be exact.

Today is my day off. I have been helping to take care of my Mom since she had a rather nasty spill at the mall right before Christmas and it has been a very eye opening experience for me. A little role reversal of taking care of her, since she was the one who took care of and raised me. And realizing just how easy she is to take care of. A little cooking, and cleaning and then she wants to play Tetris the rest of the time, for pain management. Well that's how it was at first, but now she's starting to feel better and do stuff which makes me very happy, because it is very distressing to see your Mom in so much pain : (

On the creative front I haven't had a whole lot of time to do much of anything. I have been playing around with Tatting bit, since it's easily transportable, but haven't produced anything significant since........hmmmm....well it's been way toooo freaking long. This is my fault since I just need to make time, no matter what is going on. Tomorrow I'm going to take some polymer clay and see if I can get my Mom to start creating again. That's something that she's let go by the wayside for years. She used to do a bit of sculpting when we were kids and loves Ceramics but really hasn't done anything in forever, and I know she misses it a lot. I'm hoping I can motivate her and myself to create something.

In the meantime I'm playing catch up at home, as in catching up the laundry, dishes......and stuff.

One of these days I'll blog regularly........um, right.

Tuesday, November 02, 2010

It's November!!!

How was your Halloween? I have to say that the positive thinking for the weather worked. We ended up having a warmer than normal, and dry, Halloween. Talk about a nice surprise, and then yesterday it stormed and poured down rain all day. Nothing like a little "magic" to hold off the storm, eh? However we helped my daughter move yesterday and weren't able to take the truck due to the rain (and no canopy), but the Explorer worked great and we were done fairly quickly and without getting too wet!

I don't have pictures of my finished scull yet but here's a photo of what it looked like, in progress. Do you like the red? Looks a bit bloody but it's really red Victorian pictures. I like the look because at first it's looks icky and scary, but if you get up close you can see Fancy Ladies and Birds and Trees. The two glass cabochons on the right are an experiment in big pendants. It will be interesting to see how they turn out.


I'll leave you with our Jack O' Lanterns and a scary boy for Halloween.

Thursday, October 28, 2010

A Couple Of Things....


I've been working on for Halloween fun! You can see I've started working on some very basic designs for Halloween Needle Punch projects. These will most likely end up as projects for next Halloween.
 You can see a bit of the progression. My "rough" drawings, then copies, and coloring in with crayons (of course). I could use markers but I don't want them soaking through the paper. Next I will pick my embroidery floss colors. Do you like my mondo bag of colors to choose from? Bought it at JoAnn's and used a 40% off coupon. Great deal!

I also picked up a mask from Micheal's I think it was a $1.99. Wait till you see what I am doing with it!

This week is conference week for the boys. I got Duncan and Connor's out of the way on Tuesday. They are both doing great! I always enjoy those conferences. Dakota's are in about an hour......let's just say it should be interesting.....

It's been half days all week for school (except the high school). I'm really looking forward to the weekend and the boys (especially Connor) can hardly wait for Sunday night Trick or Treating! The weather around here usually isn't that great for All Hallows Eve. It's either cold, rainy or both. Keep your fingers crossed for a freak warm up :-D A Mom can alway hope anyway.

Have a great day!


Wednesday, October 20, 2010

Look What I Found!


This is a beaded pouch I made, hmmmm........ over 15 years ago. The design came from an issue of Bead & Button for Peyote Stitch. There is a loop on each side so it can be "worn" as a (rather large),  necklace. The pouch measures about 3" square, without the fringe. I think that maybe, I should make a "chain" for it. I'm not sure out of what yet, but maybe Macrame would give it the "Natural" look that I think it needs. Any suggestions?

It's been a busy week. Duncan ended up being home sick, for a day, for the 3rd time in 3 weeks. This prompted an immediate visit to the Dr. After the blood work they decided that it was the same virus, lingering for the past 3 weeks. I admit that it worries me a bit. He tends to be prone to headaches (not migraines) and this time it was accompanied by a fever. Needless to say, he is back at school today and unfortunately missed the a lot of Cross Country, since even when he was at school, he still didn't feel up to running. Hopefully Spring will prove to be better for him Sport wise, running track.

Now I am off to design a quick needle punch design for Halloween!

Thursday, October 14, 2010

"Changing Channels"

I think that would be a good term for going from satellite & dsl to cable. What a freakin pain in the butt!! It's taken about 2 days to get emails and such updated. I'm sure there are a couple of things I've forgotten but I'll remember sooner or later. We also made the decision to drop the land line all together. Strange to give up the phone # I've had for almost 20 years, but the majority of the calls are from survey people and such. Cell phones are pretty much the thing around our house and here to stay!

The reasons for the change, $$$ being the first, second Frontier (formerly Verizon) seemed to forget to send statements and when the bill went up, around the beginning of Summer. No one seemed to be able to give me a straight answer as to why, nor were they capable of sending me an itemized bill, paper, email or otherwise. Makes me wonder if this happened to anyone else when things switched over.

Anyway, I'm over it and moving on to trying out cable. 

I've been working with polymer and on a couple patterns for punch needle embroidery. You should see a "hint" of something next week.

Monday, October 11, 2010

Cake Balls & Marshmallows....


Chocolate & Vanilla


Vanilla & Carrot Cake


Red Velvet & Carrot Cake


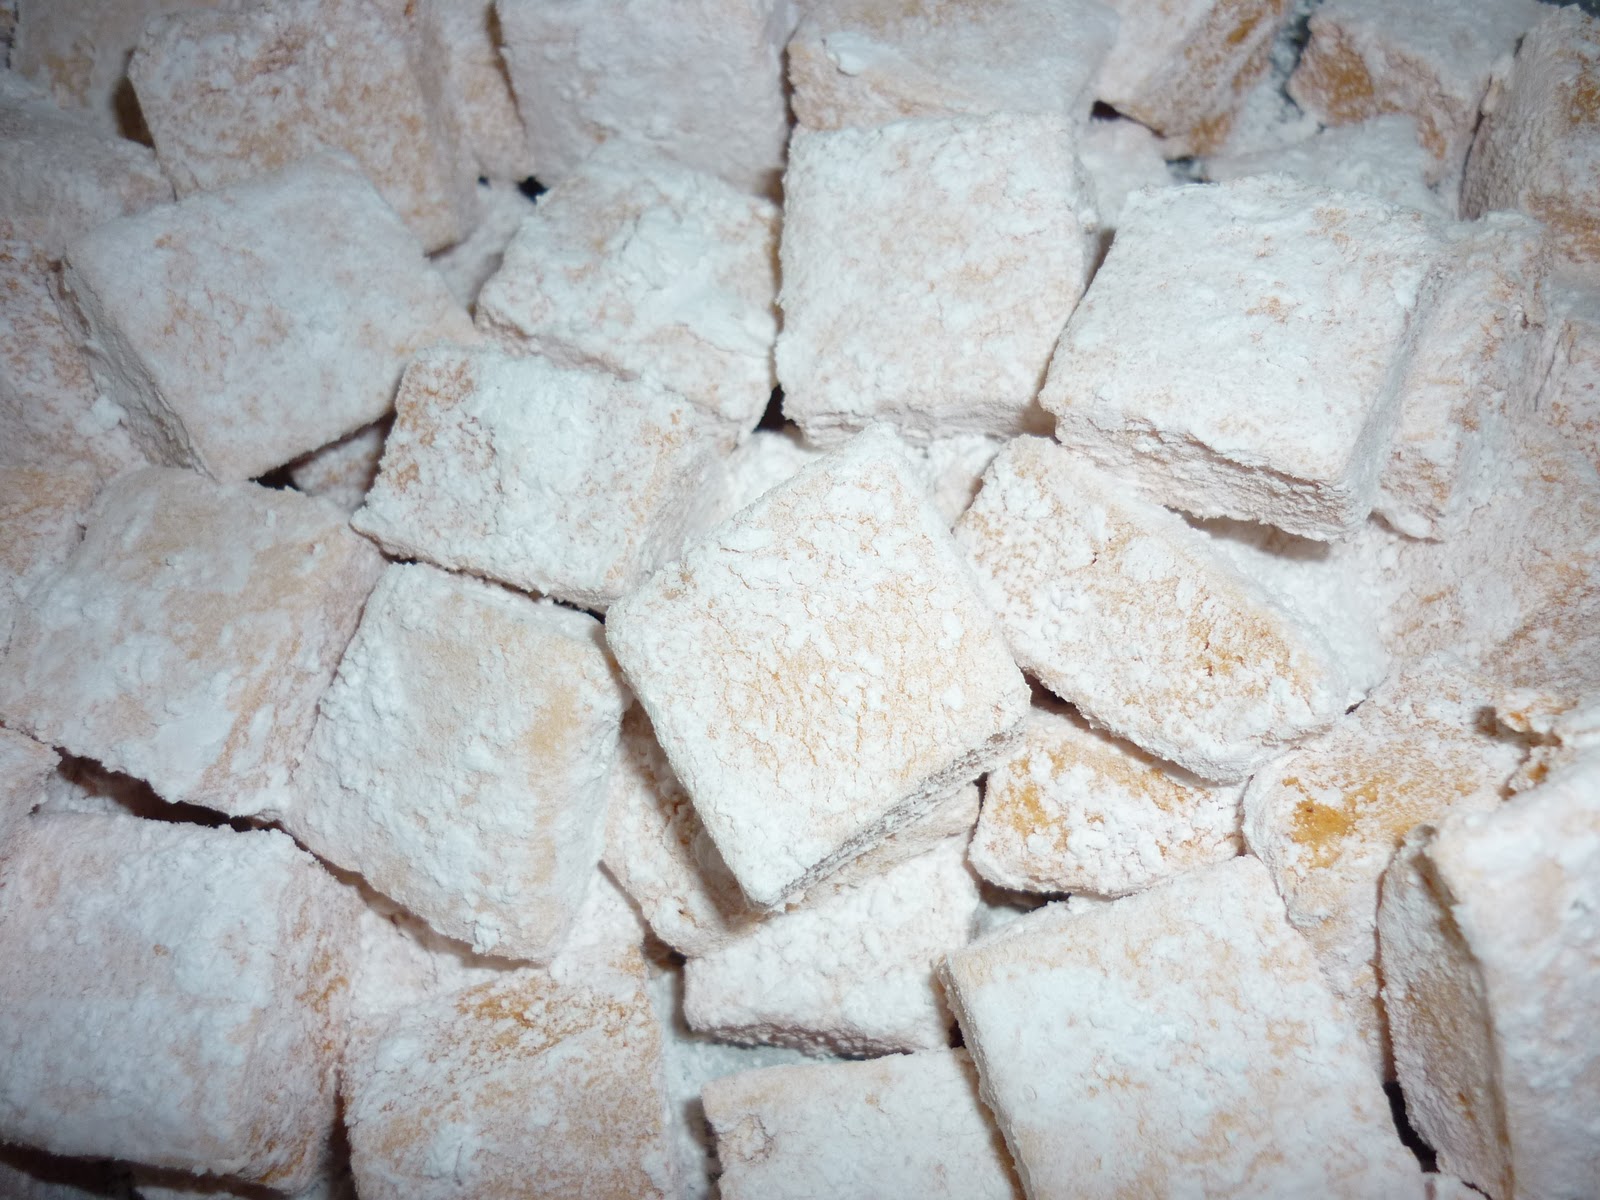
Pumpkin Spice Marshmallows, Cut

Sugared Up

Have you heard about cake balls? They are an incredibly simple dessert that seems to be making the rounds on the net. In fact, that's where I gleaned the recipe from. All you need is on package of cake mix and one can of frosting. Make and bake the cake according to the directions on the package and them crumble in a large mixing bowl. Add one can of frosting, mix well then form into balls. I used an ice cream scoop to form mine. They can be shaped by hand. You can also refrigerate the mixture to firm it up a bit. This is a hit with Jimmy and the boys! No extra frosting needed.

I also whipped up some homemade Pumpkin Spice Marshmallows. Keep in mind that homemade ones are nothing like the store bought variety. They have a certain light and airy quality and melt in your mouth. Here is the recipe, and I highly recommend using a stand mixer, since these require an intensive amount of mixing (over 10 minutes) and that would be very hard on an electric hand mixer.

Pumpkin Spice Marshmallows

3 pkgs unflavored gelatin
1 cup water (split for use)
1-1/2 cups granulated sugar
1 cup light corn syrup
red & yellow food coloring (or orange)
1/2 cup canned pumpkin (not sweetened)
1 tsp cinnamon
1 tsp ginger
1/4 tsp nutmeg
1/4 tsp allspice

Coating for marshmallows
1/4 cup powdered sugar
1/4 cup corn starch
(I ended up using quite a bit more than this)

Prepare a 9x13" pan by lining with aluminum foil and spraying with non-stick cooking spray. Sift together powered sugar and cornstarch and apply a generous dusting to the entire pan. Set pan and sugar, cornstarch mix aside for later.

Place 1/2 cup water in bowl of your stand mixer (fitted with the whisk attachment), and sprinkle gelatin on top. Let gelatin sit and dissolve for at least 5 minutes.

Place remaining 1/2 cup water, corn syrup, and granulated sugar in a medium saucepan over medium-high heat. Stir until sugar is dissolved and insert candy thermometer.

Allow mixture to cook without stirring until it reaches 240 degrees (soft ball stage).

Once sugar mixture has reached the proper temperature, remove it from the heat immediately. Proceed to turn mixer on low, and slowly pour the hot syrup into the mixer bowl.

Gradually increase the speed of the mixer until it is running on high. Whip the marshmallow mixture for 10 minutes or until the mixture is stiff and shiny.

While the marshmallow is mixing, place the pumpkin puree in a small bowl and add the spices. Once the marshmallow has reached the correct consistency, add the food coloring until you have reached the desired shade of orange. Mix until uniform in color. Using a spatula, gently fold the pumpkin puree, spice mixture into the marshmallow, stirring until candy is well mixed.

Pour marshmallow mixture into prepared pan and smooth the top. Allow to sit and firm for at least 8 hours. Do not refrigerate. 

Cover where you are going to cut marshmallows with wax paper and liberally sprinkle with sugar, cornstarch mixture. Sprinkle top of marshmallow with same mixture and turn onto prepared surface.

Carefully peel back foil from marshmallow and dust with more sugar, cornstarch mixture. Then cut carefully into squares with a large knife or use cookie cutters.

Store marshmallows in a dry airtight container at room temperature.

So there it is! My next attempt at marshmallows will be chocolate ones.

Hope you all had a great weekend!

~Happy Monday~

Saturday, October 09, 2010

A New Beginning....


Now that my first tutorial is done, I feel like I'm taking a new path in life. Over the past few weeks I have given up (quit) some things that were incredible time "eaters" for me. First and foremost were the games on Facebook. Ridiculous, when I think about all the time wasted keeping up a restaurant, farm, homestead, kingdom, whatever! There is absolutely no benefit from doing any of those for me, other than avoiding the things I want, or need, to be doing. 

Next is just DOING the things that I want or need to do! The first was getting that tutorial done. As simple as it may seem it was a huge thing for me. It's not "perfect" by any means, but the gist of the idea, I think (hope), was clear. I have also been clearing out my creative areas. Whether it's selling things on Ebay or donating to the library, Services for the Blind, or Goodwill.

I am pretty much busy every day of the week and it's a good busy, whether I'm creating, cleaning or running the kids to sports and back. Life feels good!

Granted, I still read the blogs I keep up with and still check in with facebook, using it more as a promotional tool than anything else.

So my hopes for my blog are to start posting as often as I can and keep you up to date on what I'm working on. I hope to post more free tutorials but from now on I won't make promises of when I'll have them ready, since I haven't been very good about following through on dates. So the picture above is of a few things I made last year out of polymer clay. I want to incorporate them into a couple of jewelry designs over the next week. Should be fun!

So here's to new beginnings! I hope you're having a terrific weekend!

Friday, October 08, 2010

I Finally Have It Done!!!

Whoo Hoo! Without further ado.....and the twenty million reasons why I didn't get it up when I said I would....


From Seat Belt to Fashion Statement


Here is the basic list of items needed to complete this project:
1 seat belt-the one I used is from my Dad, he ordered them for my Mom's
Toronado, but for some reason they didn't work, so he decided to pass them on to me for the exact reason I'm using them. Thanks Dad!
A sewing machine
thread
tape measure
straight pins
scissors (small and large)
lighter or candle


This first step it a “personal preference” for me. You do not have to do this step.
Some people like these extra labels for their own personal reasons, I do not, so I remove
this tag.


Next you are going to remove the metal pieces what would normally be used to anchor
the belts to your car. These are the pieces with the holes in them. DO NOT remove the
buckle! In fact it's a good idea to keep the belt buckled, as a reminder. Also do not put
your thumb in the way of the cutting blade, like I did (dork). I use a razor knife to cut
these threads since they are a bit thicker than normal threads. Do this step very
CAREFULLY!


Then you are going to unbuckle the belt and measure each side to determine the size of
your belt. Mine is going to be about 38”. Be sure to leave a 3-5” tail for adjustment of
your belt (see top of photo).


The locking part (female) measured 15”, so this side doesn't need anything further done.

The insert part (male) needs to be cut down to 24” (15”+24”=39”). You are going to
allow one extra inch for overlap.


Once you have cut the male part down you are going to need to “finish” the edge to
keep it from fraying. You could probably use fray check but since the belts are nylon I
use a lighter, or candle, to gently melt the edge of the fabric. Just gently run the cut edge
of the belt along the flame until you have a nice even melt.


This next step doesn't make a huge difference by I like to lock the belt together before I pin it so that the finished edge is facing the body, of the person wearing the belt, on the
male side of the belt. Again this is totally a personal preference thing.

Note the right side of the belt above.


Then overlap the two cuts edges by 1” and pin to hold. Keep in mind
that this seam will not meet in the center due to having a “short” side.


Then sew two rows of zig-zag stitch across the overlap about 1/2” apart. I use regular
thread and double stitch for extra holding power.


And there you have it, a “Seat Belt, Belt”!

Note, that unless you have extra wide loops on your jeans, most seat belts will not fit
through the loops, and these belts are usually worn low on the hips.

I hope you enjoyed this tutorial. It was a fun learning experience for me and I hope to do
more.

I would really appreciate any feedback on it, good or bad, so don't be shy.

Tuesday, September 28, 2010

Just Had To Post This Link...

This is a must see! My oldest son attends Snohomish High School and plays in the marching band. He told me about this when I picked him up from the game.

Please watch....special touchdown

Monday, September 27, 2010

Maybe This Will Help.....

We have decided to do away with both the hard line (house phone) and the satellite dish (no cable either). The main reason for this decision was financial, but now (amazingly) everyone in the house is looking forward to it. Granted the phone isn't going to be a big deal, we are a cell dependent family. Everyone in the house (except the little guy) has one, and that's pretty much the main form of communication in this house with the exception of the computer. Now the television on the other hand, I thought would be a HUGE deal, but surprisingly the boys took it rather well. They have about a week before the "plug" is finally pulled and they will get to be "creative" with their time. It should be interesting to see what happens with all of us, I admit to enjoying my evening television time after the boys are in bed.

I know, I know! Where is that darn tutorial? Well it WILL be done tomorrow or Wednesday. Actually writing a tutorial is a new experience that I'm learning and enjoying. Now I know why it takes people awhile to come out with new ones. I will be looking for feedback once it's done.

On a weather note, I think the Earth has tipped and we are now sitting somewhere in the Southern Regions. It is warm and uncomfortably humid tonight. Worse than it's been all Summer or any Summer for that matter. Strange weather!

Enjoy your evening!